

If you’ve been wanting to self-host n8n but every guide you’ve read looks like it was written for a senior DevOps engineer — this one is for you.
No jargon. No complicated commands. We’re going to use Dokploy, which is basically a user-friendly control panel for your server, and its built-in n8n + PostgreSQL template to get you running in under an hour.
By the end of this guide, you’ll have:
- ✅ A VPS (your own server in the cloud)
- ✅ Dokploy installed on it
- ✅ n8n live on your own domain with HTTPS
- ✅ PostgreSQL as the database (this is the reliable, production-ready option)
Let’s get into it How to install n8n on Dokploy?
Table of Contents
What Is Dokploy? (30-Second Version)
Dokploy is a free, open-source tool that sits on your server and gives you a clean web dashboard to deploy and manage apps — without needing to know Docker commands or edit config files manually.
Think of it like cPanel, but modern and built for running apps like n8n, WordPress, Ghost, and more.
The best part for us: Dokploy has a ready-made n8n template with PostgreSQL built in. You pick the template, fill in your domain name, hit Deploy — and it handles the rest.
What You’ll Need Before You Start
You don’t need to be a developer. But you do need these three things:
| What | Why |
|---|---|
| A VPS (cloud server) | This is where n8n will live |
| A domain name | So you can access n8n at something like n8n.yourdomain.tld |
| About 30 minutes | Follow every step, don’t rush |
That’s it. Nothing else.
Step by step Installion Guide
Step 1: Get a VPS (Your Cloud Server)
A VPS is basically a small computer in the cloud that’s always on. You rent it by the month. For running n8n, you need something with at least 2 GB RAM and 20 GB storage.
Recommended providers that work great with Dokploy:
- Hetzner — cheapest, €4–6/month, servers in Europe and the US. Great for n8n.
- Hostinger VPS — beginner-friendly dashboard, around $4–7/month
- Contabo — Lot’s of RAM and cores at good cost ratio ($5+/mo.)
- Vultr — good global coverage
👉 Our recommendation: Contabo’s VPS10 plan (~$5/month, 4 vCPU, 8GB RAM) is more than enough for most n8n users.
When you create your VPS, choose Debian as the operating system. That’s it. Once it’s created, your provider will show you the server’s IP address — copy that somewhere, you’ll need it in a minute.
Step 2: Point Your Domain to Your VPS
Before installing anything on the server, let’s tell your domain to point to it.
Log into wherever you bought your domain (Namecheap, GoDaddy, Cloudflare, etc.) and go to the DNS settings. Add a new record:
| Type | Name | Value |
| A | n8n | YOUR.VPS.IP |
Save it. DNS changes take anywhere from 2 minutes to a few hours to take effect. You can check if it’s working by going to whatsmydns.net and searching your domain.
💡 Tip: While waiting for DNS to propagate, just continue with the next steps. By the time you reach the domain step inside Dokploy, it’ll likely be ready.

Step 3: Log Into Your Server
Now we need to connect to the server. This sounds scary if you’ve never done it, but it’s just opening a terminal window and typing one command.
On Mac or Linux: Open the Terminal app. On Windows: Open PowerShell (search it in the Start menu).
Type this, replacing YOUR_SERVER_IP with your actual IP:
ssh [email protected]Press Enter. If it asks “Are you sure you want to continue connecting?” — type yes and press Enter.
It’ll ask for your password (the one your VPS provider gave you). Type it and press Enter. The password won’t show up as you type — that’s normal, just type it and hit Enter.
You’re now inside your server. 🎉
Step 4: Install Dokploy
Here’s where things get easy. Dokploy has a single command that installs everything for you — it sets up Docker, creates all the required services, and gets the dashboard running.
Copy and paste this into your terminal, then press Enter:
curl -sSL https://dokploy.com/install.sh | shNow just wait. The installation takes about 3 to 7 minutes. You’ll see a lot of text scrolling — that’s normal. When it’s done, you’ll see a success message.
⚠️ One thing to check first: Make sure ports 80, 443, and 3000 are open in your VPS provider’s firewall settings (usually called “Firewall Rules” or “Networking” in their dashboard). If these are blocked, Dokploy won’t work correctly. Most providers have these open by default.
That’s literally the only command you need to run. Dokploy is now installed.
Step 5: Open the Dokploy Dashboard and Create Your Account
Open your browser and go to this URL (replace with your actual server IP):
http://YOUR_SERVER_IP:3000Give it about 15 seconds after installation before visiting this URL — Dokploy needs a moment to fully start up.
You’ll land on a setup page that asks you to create an admin account. Fill in:
- Your email address
- A strong password
Click Create. You’re now inside the Dokploy dashboard — your own server control panel.

Step 6: Create a New Project
Projects in Dokploy are like folders that group your apps together. Let’s create one for n8n.
- In the left sidebar, click Projects
- Click the Create Project button
- Give it a name — something like n8n
- Click Create
You’ll land inside the project. It’s empty right now — we’re about to add n8n to it.
Step 7: Deploy n8n Using the PostgreSQL Template
This is the step where Dokploy does the heavy lifting for us. Instead of manually setting up databases and config files, we’re going to use a ready-made template.
Inside your project:
- Click Create Service
- Select Template from the options
- In the template gallery, search for n8n
- Look for the template named “n8n” that mentions PostgreSQL — it has the database included
Why PostgreSQL? It’s the database that stores all your workflows, credentials, and execution history. PostgreSQL is the reliable, production-grade option. The simpler n8n templates use SQLite which is fine for testing but not great for real usage.
- Click on the n8n + PostgreSQL template to select it
- You’ll see a few fields to fill in — the most important one is your domain
Enter your n8n subdomain here — for example: n8n.yourdomain.com
- Click Create (or Deploy, depending on your Dokploy version)
Dokploy will now download everything it needs and spin up n8n with PostgreSQL automatically. This takes 2 to 5 minutes.

Step 8: Set Up Your Domain and Enable HTTPS
Once the template is deployed, we need to make sure your custom domain is connected and secured with HTTPS (the padlock in the browser). Dokploy handles the SSL certificate automatically — you just need to tell it which domain to use.
Inside your n8n service in Dokploy:
- Go to the Domains tab
- You may already see a default entry — remove it
- Click Add Domain
- Enter your subdomain: n8n.yourdomain.com
- Set the Port to 5678 (this is n8n’s default port — don’t change it)
- For HTTPS, select Let’s Encrypt — this gives you a free, automatic SSL certificate
- Click Save
Dokploy will now request the SSL certificate and set up the secure connection. This takes about 60 seconds.
🔴 If the SSL fails: It almost always means your DNS hasn’t finished propagating yet. Wait 10–15 minutes and try again. Use whatsmydns.net to confirm your domain is pointing to your server IP.

Step 9: Open n8n — You’re Done!
Go to your browser and visit:
https://n8n.yourdomain.tldYou should see the n8n welcome screen asking you to create an account. Fill in your details, and you’re inside your very own self-hosted n8n instance.
Everything is working:
- ✅ n8n is live on your domain
- ✅ HTTPS is active (padlock shows in the browser)
- ✅ PostgreSQL is running as your database in the background
- ✅ Your workflows and data are being saved properly
Go build some automations. 🚀

Common Problems (And Simple Fixes)
Even with a beginner-friendly setup, things can go sideways. Here are the issues people run into most often:
❌ “I can’t access Dokploy at port 3000”
Fix: Go to your VPS provider’s dashboard and check the firewall/networking settings. Make sure port 3000 is allowed. Also make sure you waited at least 15 seconds after installation before visiting the URL.
❌ “The SSL certificate failed”
Fix: Your domain is probably still propagating. Wait 10–15 minutes, then go back to the Domains tab in Dokploy and try requesting SSL again. Check whatsmydns.net to confirm your domain is pointing to the right IP first.
❌ “n8n loads but I can’t log in or it crashes”
Fix: The PostgreSQL database might not have fully started when n8n tried to connect. Go to your Compose service in Dokploy and click Redeploy. This restarts everything cleanly.
❌ “I visit my domain and get an error page”
Fix: Check that the port in your Domains tab is set to 5678 — not 80, not 3000. That’s the port n8n runs on internally.
❌ “My n8n domain shows ‘Not Secure’ instead of the padlock”
Fix: SSL isn’t active yet. Go back to the Domains tab, confirm the domain is correctly added, and make sure you selected Let’s Encrypt. If DNS is propagated, clicking Save again usually triggers the certificate.
How to Update n8n Later
When a new version of n8n comes out, updating is simple:
- Go to your n8n service inside Dokploy
- Update version on the compose file
- Click Redeploy
That’s it. Dokploy pulls the latest version and restarts n8n with all your data intact.

Wait — What Does This Actually Cost?
Let’s be straight about it:
| Item | Monthly Cost |
|---|---|
| VPS (e.g., Contabo VPS10) | ~$5–7/month |
| Domain name | ~$1–2/month (annual cost split monthly) |
| Total | ~$6–9/month |
Reasonable. But here’s what that price doesn’t include: your time.
Setting this up the first time takes 30–45 minutes if everything goes smoothly. Handling updates, backups, unexpected errors, and keeping the server secure is an ongoing thing — not huge, but it’s there every month.
If you enjoy the technical side, great — this setup is solid and you have full control.
If you’d rather just skip to the automating part — that’s where n8n LaunchPad comes in.
Rather Skip All of This? Try n8n LaunchPad
Everything in this guide works. But it’s also about 40 steps and a VPS subscription and a domain and SSH access and troubleshooting and ongoing maintenance.
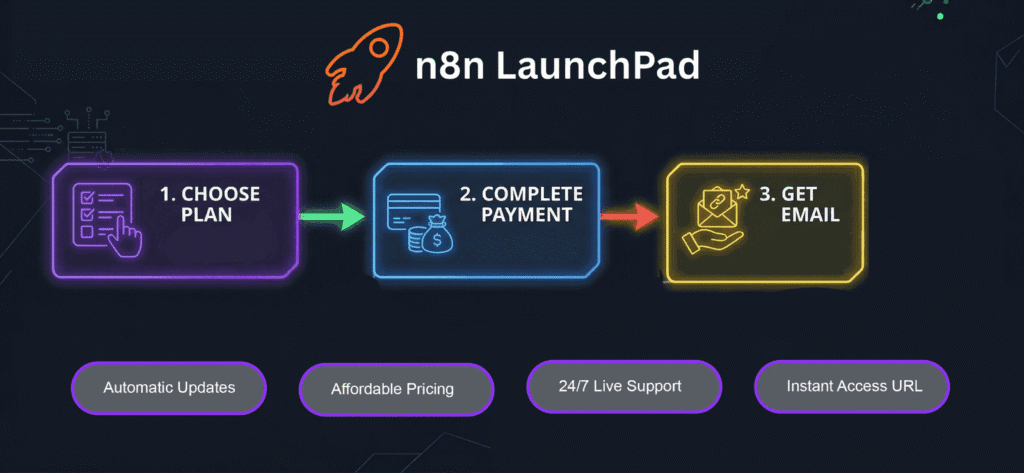
n8n LaunchPad gives you a fully deployed, fully managed n8n instance for $6/month. No server. No terminal. No configuration. You sign up, and your n8n is ready in minutes.
| This Setup | n8n LaunchPad | |
|---|---|---|
| Setup time | 30–60 minutes | Under 30 seconds |
| Requires SSH / terminal | Yes | No |
| SSL and domain included | You set it up | Included |
| Updates | Manual via Dokploy | Automatic |
| Backups | You configure them | Included |
| Monthly cost | ~$6–9 (VPS + domain) | $6 flat |
Same money. Way less time.
→ Start automating in minutes: Get n8n LaunchPad at $6/mo
Frequently Asked Questions
Do I need to know how to code to follow this guide?
No. This guide is written for complete beginners. If you can copy-paste a command and click a few buttons in a browser, you can follow this. The only “technical” part is Step 3 (logging into your server with SSH), and we walk you through exactly what to type.
What is PostgreSQL and why does this template use it?
PostgreSQL is a database — basically a storage system where all your workflows, automation history, and credentials get saved. The n8n + PostgreSQL template uses it because it’s more reliable and faster than the simpler alternative (SQLite). For any serious n8n usage, PostgreSQL is the right choice. The template sets it all up for you automatically.
Which VPS provider should a beginner choose?
Hetzner is our top recommendation for most people — it’s affordable, reliable, and well-documented. Hostinger VPS is also a good pick if you prefer a more guided setup experience. Both work perfectly with Dokploy.
Do I have to use a subdomain like n8n.yourdomain.com, or can I use my main domain?
You can technically use your main domain, but a subdomain is better practice. It keeps things organized (you might want to host other apps on the same server later), and it won’t interfere with any existing website on your main domain. n8n.yourdomain.com or automation.yourdomain.com are both great choices.
What happens to my workflows and data if I redeploy or update?
Your data is stored in PostgreSQL, which runs in a separate container with its own storage volume. Redeploying or updating n8n does not touch the database. Your workflows, credentials, and execution history are safe.
Can I run other apps on the same server alongside n8n?
Yes! That’s one of the great things about Dokploy — you can create multiple projects and deploy multiple apps on the same VPS. Just make sure your server has enough RAM for everything you want to run (2 GB is fine for n8n alone; go for 4 GB if you plan to add more services).
What happens if I forget my n8n password?
You can reset it from the Dokploy dashboard. Go to your n8n service, open the Environment tab, and you can update the relevant environment variables to set a new owner password. Then redeploy.
Is this setup secure?
Yes, if you follow the guide correctly. Your n8n runs behind HTTPS (encrypted connection), the Dokploy dashboard is protected by your admin password, and the database is not exposed to the public internet. For extra security, make sure you use a strong password for your Dokploy account and your n8n account.
Can I use n8n with my own custom workflows right away after setup?
Yes. Once you complete the setup and create your n8n account, you’re immediately on the free self-hosted version with no artificial workflow limits. You can start building automations right away.
What if I get stuck on a step?
Leave a comment below or reach out to our support — we’re happy to help. You can also check the official Dokploy docs and the n8n community forum for additional guidance.
You Did It
Self-hosting n8n with Dokploy is genuinely one of the better ways to get n8n running on your own infrastructure without needing a computer science degree. The template-based approach keeps things simple, PostgreSQL keeps your data safe, and Dokploy’s built-in SSL means you don’t have to fight with certificates.
If you got stuck anywhere, the FAQ section above covers the most common issues. Drop a comment if you hit something not covered there.
And if you realized mid-tutorial that you’d rather skip the server management side entirely — n8n LaunchPad is ready when you are.
→ Get your managed n8n instance — no setup required: n8n LaunchPad at $6/mo